Send to DocuWare Settings
Configure General Settings
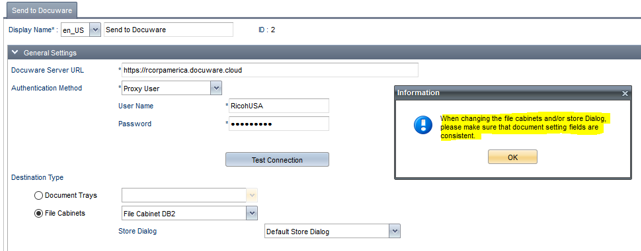
Switch to the [Setting] tab and complete the following fields:
|
Setting |
Options |
|---|---|
|
DocuWare Server URL |
|
| Check Version |
Click Check Version to perform a version check of the DocuWare server:
|
|
Authentication Method |
Select the authentication method (required):
|
|
Destination Type |
These fields are editable only after you have performed a successful Test Connection or Authorization.
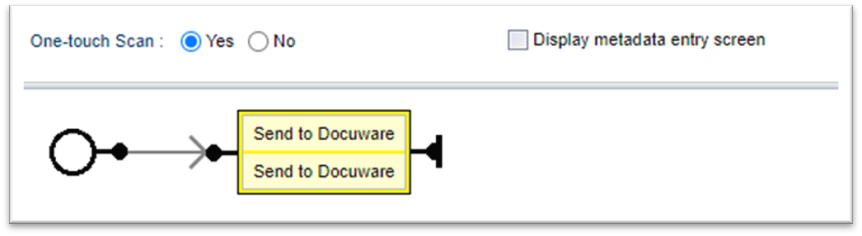
When creating the workflow, you can also enable One-Touch scan for this connector only if a Document Tray is preselected (One-Touch scan is not supported for File Cabinets). After successful login, the user can immediately scan the document with one touch, and the scanned document will be sent to the Document Tray you selected here. For instructions to enable One-Touch Scan, refer to Create a Workflow.
When the Administrator selects a File Cabinet, a message pop-up reminds you to ensure you check the Document Settings fields to verify consistency. You must manually update and/or remove all existing property settings and add new ones after any cabinet/store type change.
|
|
HTTP Proxy Server |
If you are connecting to DocuWare through a proxy server, complete the following fields.
|
If the user login does not have permission to access a File Cabinet or Store Dialog destination that you pre-set here, the user see an error on the MFP that states "Error retrieving properties. Please retry request and validate server logs". In the case of a Document Tray that the user login does not have permission for, the scan job will simply fail. To correct this problem ensure that you grant user access to the require File Cabinet Profiles, Dialogs, and Document Trays within DocuWare Configuration.
Configure Property Settings
This section allows you to choose Document Property pre-set values for the File Cabinet selected under General Settings. The user will complete these properties at the MFP, OR the Administrator can pre-set some values if preferred. If you enabled a Document Tray as the destination type or if a File Cabinet is not selected, an error message displays indicating the problem.
When you select a File Cabinet, a message pop-up reminds you to ensure you check the Document Settings fields to verify consistency. If you change File Cabinets, any pre-existing selections are maintained, so ensure you makes changes after you select a new cabinet.
-
Click [Add] and then choose a property from the Property Name list.

-
To set the property value, there are three options:
-
To preset a value, either select a value from the metadata list, or enter it manually. The options in the metadata list depend on the Cabinet selected.
- If any of the field values are set as predefined entry on the DocuWare server, the metadata list is disabled. The corresponding field is displayed on the MFP.
- If the Manual Entry field is set to “Document Name” on DocuWare server and no value is set for that field from Management Console or MFP, and data type is “Text”, during job execution (uploading file), the field will be populated with scan job Document Name. If a value is set for the field, this value will be shown as Document Name after it is uploaded to DocuWare.
-
To prevent the user from changing a preset value, disable the [Allow User Modification] checkbox.
-
To allow the user to set the value with no preset, leave the Property Value fields blank.
-
Refer to Troubleshooting below if you encounter an error message.
If any of the field values are set as a predefined entry or read-only on the DocuWare server, the list is uneditable in this screen.
-
Click [Save].
Each MFP login user can have multiple DocuWare Authorized Users. Separate login users for On-Premise and Cloud (e.g., john.doe and jose.rizal) can each have their own DocuWare Authorized Accounts without conflicts.
One-Touch Scan Settings
This connector supports One-Touch Scan when one of the following conditions are met:
| DocuWare Version | Conditions |
|---|---|
| Version 7.10 or earlier |
The Document Tray is preset as the Destination Type AND the Authentication method is set to Proxy User OR Authentication method is set to Login User AND the MFP user's name and password match the DocuWare user credentials |
| Version 7.11 or later | The Document Tray is preset as the destination type AND only one DocuWare account is authorized in the SLNX User Console. |
One-Touch scan is only supported when a File Cabinet or Document Tray is pre-set.
Refer to Create a Workflow for configuration instructions.
DocuWare Troubleshooting
In some cases, you must verify that your entries match the Document Settings fields. Review the error messages below to troubleshoot and resolve specific problems.
Change File Cabinet
When you select a File Cabinet, the message below pops up to remind you to ensure you check the Document Settings fields to verify consistency. You must manually update and/or remove all existing property settings and add new ones after any cabinet/store type change.
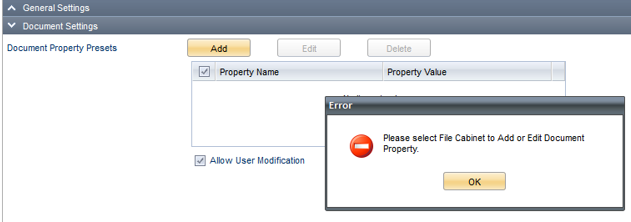
Document Tray/File Cabinet Mismatch
If you enabled a Document Tray as the destination type or if a File Cabinet is not selected (in General Settings), an error message displays indicating the problem when you click Add.
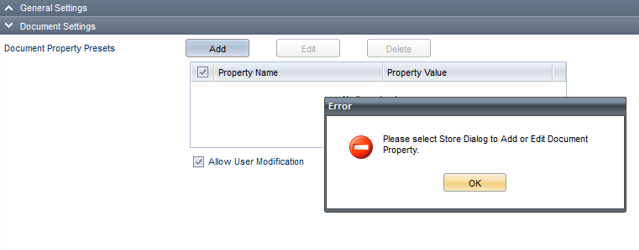
No Store Type Selected
If you click Add, but a Store Type is not selected, the following errors message displays.
Invalid Date Format
This error message indicates that you provided a different date format into the Manual Entry text box than the type specified for the selected Property Name in the Document Settings screen.

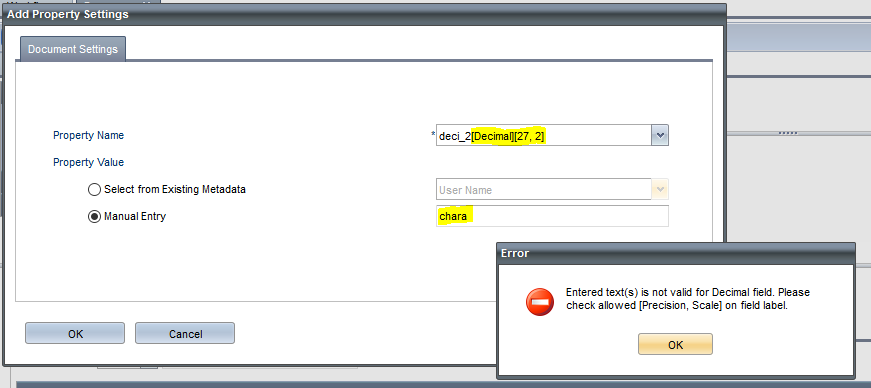
Decimal Data Type
This error message indicates that you provided text format (rather than decimal format) into the Manual Entry text box. Based on the Property Name you selected; you are required to enter decimal format.

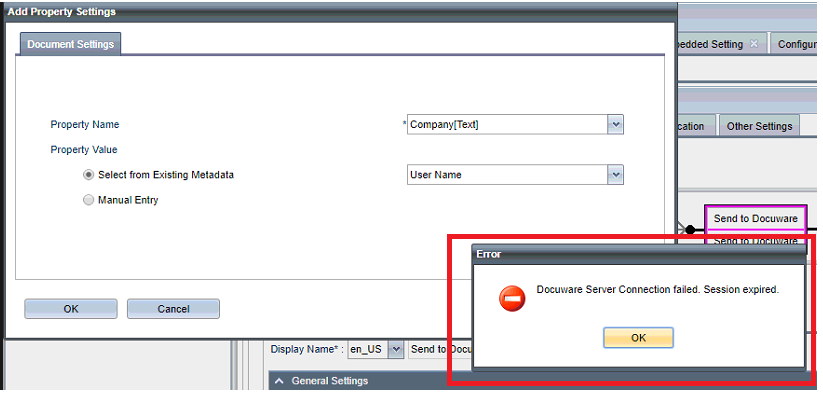
DocuWare Server Connection failed
This error message occurs if you have not made any changes within the Management Console over a period of time and the connection to the DocuWare Server is therefore interrupted. Click OK to close the message, and then return to the General Settings screen and click Test Connection to reinitialize the connection to the DocuWare server.
Property Name Behavior
Particular Property Names require special attention when also selecting Manual Entry.
Decimal Data Rounding
This behavior occurs if you provided more digits into the Manual Entry text box than were indicated for the selected Property Name. If you provide additional digits, the value will round up to the required digits.
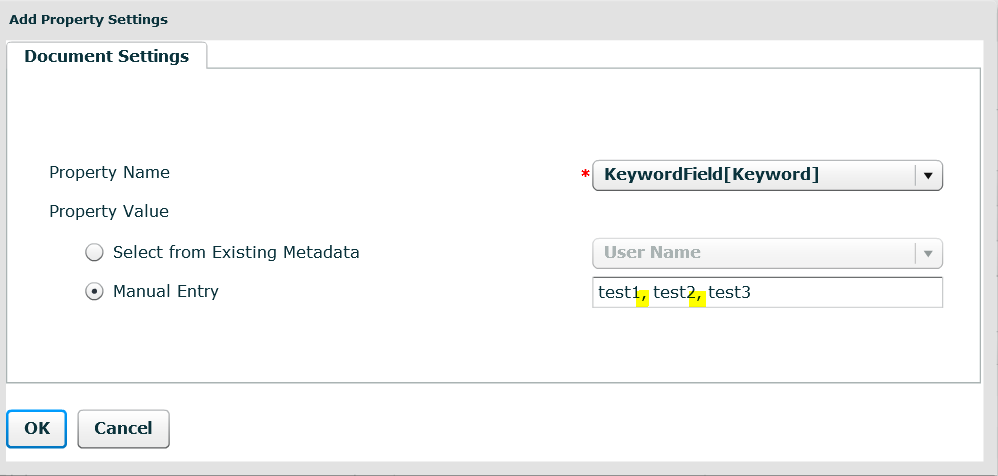
Comma-Separated Keywords
This feature allows the user to enter more than one Keyword at the MFP. When KeywordField is the selected Property Name, enter test 1, test 2, test 3 in the Manual Entry text box to allow users to enter multiple keywords.