Add a Zone OCR Form
-
Prepare the image data of the document to perform Zone OCR.
-
Click [Workflow] → [General] → [Zone OCR Form].
-
Click
 (Add).
 -
To create a new form based on an existing form, select the form to copy, click
 (Copy), and then select the form to edit.
The copied form name is displayed with a suffix automatically added to the copy source name starting from (1). When the maximum number of characters (64) of the form name is exceeded as a suffix is used, the end of the form name is omitted, and a suffix is added.
-
On the [General] tab, specify the form name, description, and the OCR language.
-
In [Zone OCR Form Template Image], click [Browse...].
-
Select the template image to use for configuring the anchor and designating the OCR area, and click [Open].
-
Click [Upload].
The file name, paper size, resolution, and number of pixels of the uploaded image are displayed.
-
Click the [Form Design] tab.
-
Enlarge or reduce the image area, rotate the image, and configure other settings as necessary.
To enlarge or reduce the image area, configure the Magnification setting. Enlarge or reduce the size of the image area from 25% to 200% in increments of 25%.
To rotate the image, click  or
or  . The image is rotated 90 degrees to the left or right, respectively.
-
Drag the mouse over the image to specify the OCR area.
The [Area Properties] window is displayed. For details about configuring the settings, refer to "Configuring the Area Properties" described below.
-
To configure a new anchor, click [Add Anchor].
The mouse cursor changes to a crosshair.
When an anchor is already configured, [Add Anchor] is disabled and cannot be clicked.
-
Drag the mouse over the image to specify the anchor area.
The [Area Properties] window is displayed. For details about configuring the settings, refer to "Configuring the Area Properties" described below.
-
Click
 (Save) in the form list. Configuring the Area Properties
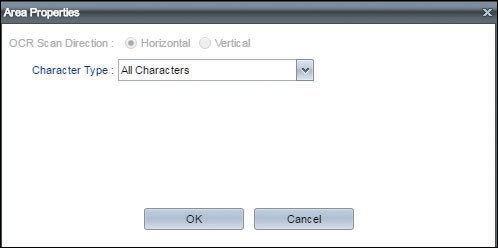
When the OCR area or anchor area is specified by dragging the mouse cursor over the [Form Design] tab, the [Area Properties] window is displayed. The [Area Properties] window is also displayed when the OCR area or anchor area border is double-clicked.
Configure the following items on the [Area Properties] window:
-
OCR area properties
-

Anchor area properties
|
Item |
Description |
|---|---|
|
Metadata Tag Name |
You can specify the metadata tag name by using either of the following.
|
|
OCR Scan Direction |
Specify the direction of text when performing OCR. This is not available when a western language is selected for the OCR language.
|
|
OCR Character Type |
Select the type of characters for which to perform OCR.
|
|
Judge as an error when the OCR result is blank. |
Select this check box to output an error when no text is detected in the specified area while performing OCR.
Use the above metadata to configure the error avoidance flow. Example of flow to avoid errors: Set a Decision Point behind the Zone OCR connector, and configure the flow to be redirected when the metadata value is "error". |